Wow! This is it. We’re going to bring it all home with this final lesson for creating an RSS email campaign in Mailchimp. If you need to catch up with is you can see everything I’ve covered so far in this series on Mastering Mailchimp.
In our last lesson you worked on the design elements of your template and got to spend some time playing around with all the fun options available in the Mailchimp template design center.
Now it’s time to add a header and some content.
{Updated for 2019}
Get yourself signed in to Mailchimp and go to the CAMPAIGNS section of the dashboard. Click your RSS campaign you started creating and then EDIT. You should be in the Mailchimp template design center.
Let’s get your header made, shall we?
Mailchimp template design – Header
Click the header in the left preview pane. When you hover your mouse over this area you will see this
These are new options for you, but will help as you move into creating content.
Hover over the upper left corner of the gray bar. If you stay long enough you will see this is how you drag this box to another section if you want to reorder it.
Move to the right and hover over the pencil icon. This is how you edit a content section. You can also edit just by clicking the main section of the box under the gray bar.
The middle option on the right allows you to duplicate a section. And the far right trash can icon will delete the content so you can leave it out altogether or put a different type of content box in its place.
Click the pencil icon or the main section of the box.
On the right you will see the content pane. It says IMAGE at the top and you have a CONTENT OPTION and a SETTINGS option.
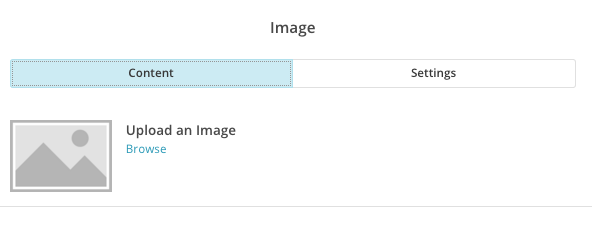
Click browse. Mailchimp will direct you to your media library. You probably don’t have any files uploaded yet. Go ahead and upload either your blog header or another graphic. The UPLOAD button is top right.
Your image will upload and then be shown in your preview pane.
In the content pane you can now REPLACE, EDIT, LINK or ALT your image.
Replace
If you want to change out a photo or graphic use this option.
Edit
Mailchimp has an extensive photo editing suite you can use to enhance your graphics. This is worth playing around with when you have a chance.
If you add a graphic that is too large for the space, Mailchimp will resize it for you and give you a warning box that it needs to be resized. Take them up on their offer to help you.
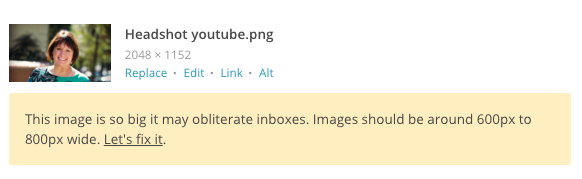
Your ideal header photo is 600px wide.
Link
You can hyperlink any photo or graphic you use in Mailchimp. This is especially useful if you want to share Pinterest graphics with your readers. Direct them back to your pin for better analytics.
Always link your header straight back to your blog so you can get a pageview out of the deal.
Alt
When you send an email to your subscribers most email providers will not show the header by default in desktop. Be sure to enter an ALT tag for your header – you can even make it funny or informative.

CHIMP TIP
- There are some email platforms, like Gmail, who will not display alt text that exceeds the width of the image. If this happens, try shortening the alt text.
- If you include a link and alt text, only the link will be displayed.
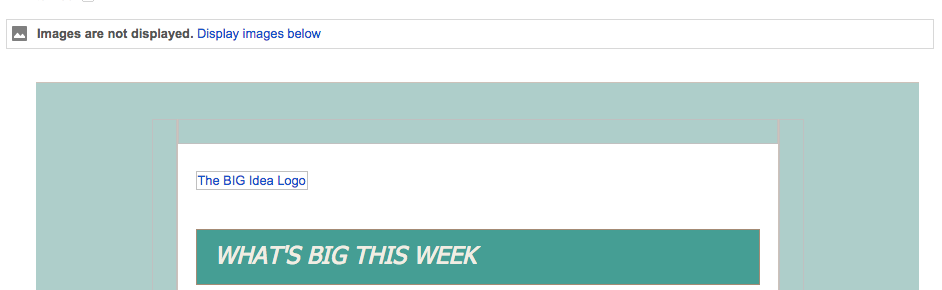
Let’s talk about your header, shall we? It might seem tempting to add a large header to your campaigns. However, if most desktop email clients don’t show the header it doesn’t make much sense to get crazy with your header.
Here’s an example of what shows up in Gmail on a desktop:
Also, if the majority of your readers are opening your emails on mobile, you don’t want to overwhelm their small screens with a huge header.
Keep your header simple and thin. Use your logo or even your picture, but don’t go crazy. The key is to get your content in front of your subscribers. Keep that in mind as priority one when designing your header.
If you click the SETTINGS tap in the right editing pane you will see some options. The first is for alignment. The second is for making your graphic reach from one edge to the other. The third option is for high-def displays. Don’t worry too much about this option but play around with the edge-to-edge option to see what you like best.
SAVE & CLOSE when you are satisfied with your header graphic.
Don’t forget to check it in the PREVIEW AND TEST section in the top gray bar. ENTER PREVIEW MODE to see how your header will look to your subscribers.
You want to do a lot of previewing while you are building your Mailchimp template design. Always SAVE & CLOSE and then preview what you’ve made.

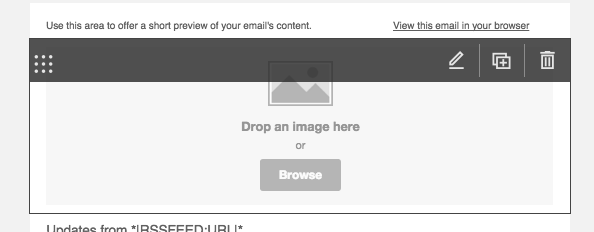
Pre Header
Above your header is a single line of text and a link to view your email in a browser. You want to customize this line of text or remove it.
Click on the line that says “Use this area to offer a short preview of your email’s content.” The right edit pane will open up and you can change this text to whatever you want. A quote, info about your site, you choose.
I suggest leaving the link to view in browser as-is.
Merge field content
Just under your header is a box of merge fields. This is how Mailchimp knows what to pull from your site. This looks complicated, but we’re going to make it easy.
First click the pencil or the box to enter the edit pane.
In the right edit pane you’ll see a gray bar at the top that says ADVANCED.

You want to change that to CUSTOM so open the drop down menu and find it.
Now you’ll see all the merge fields. We want to change these.
Here is my suggestion for the first box of merge fields. Copy and past this text into the editing box.
Updates from
{Add your blog header or H1 blog title here}
*|RSSFEED:DESCRIPTION|*In the *|RSSFEED:DATE|* edition:
*|MC:TOC|*
Replace the {Add your blog header or H1 blog title here} with either an H1 title (you can change this under STYLES) or add your blog logo – if you aren’t using it in your header or have another one you can add.
SAVE & CLOSE
Now click the next box down. It should be set to EXCERPTS in the right edit pane. You are going to leave these merge fields as-is. You want your readers to see what you are writing about but you also want them to click through to your actual blog to continue reading. Pageviews, remember?
If you want to change the blue color of the title, click SAVE & CLOSE. Click the design tab in the right edit pane and then BODY. You can change the BODY LINK – TEXT COLOR to match your blog.
SAVE and go to the CONTENT tab. Drag and drop a TEXT box under the box we just edited but above the footer info.
Replace the text in the right edit pane with this:
Other articles you may have missed:
*|RSS:RECENT|*
SAVE & CLOSE
Now drag and drop the SOCIAL FOLLOW box just above the footer. Add your social URLS and play with the STYLE and SETTINGS to make it look the way you want.

Adding ways for your subscribers to follow you on social media is a must when you send out a campaign.
SAVE & CLOSE
Footer
All that’s left is your footer. Leave it alone. You don’t need to mess with the content here. If you wish to change the color of the footer you can do it under DESIGN – FOOTER.
Guess what? You’re done. You have now created and designed your RSS email campaign in the Mailchimp template design center. Way to go!
Be sure to PREVIEW AND TEST your template to make sure it looks the way you want. As you advance in your knowledge and use of Mailchimp you may want to customize your template even more, but for beginners this is perfect.
It’s time for the most important part of this process. You need to save your template. In the top gray bar click SAVE AS TEMPLATE. Rename your work. SAVE. RETURN TO CAMPAIGN.
In the bottom right corner click NEXT.
Confirm your campaign. Check all of the line items and make changes as necessary by clicking the EDIT button. Don’t worry about social cards right now.
When everything is as you want it, it’s time to START RSS in the bottom right corner.
Ta-Da!
Your campaign is live and will go out to your list the next time you publish a post.
Yay! You did it. You set up your own RSS campaign. That wasn’t so hard now was it? You are well on your way to becoming a master at Mailchimp.
There is much more to learn, but you’ve cleared a major hurdle. I knew you could do it.
#YouCanDoThis

Leave a Reply