How To Quickly Create A New List In Mailchimp
Hey! You made it inside the gates. Nice job.
If you’ve just stumbled on this post it is part of a multi-part series called Mastering Mailchimp. Check it out!
Now it’s time to start building your very first list. Your list is your bread and butter. It is the foundation piece for all of the information, newsletters, RSS feeds, and emails you will be sending out to your readers. The quality of your list is the hinge that everything else hangs on.
Because it’s so important, you want to make sure you set up your list the right way. Today’s lesson won’t take long, but it’s critical for building a healthy list in Mailchimp and for sending out your emails.
Let’s do this together, shall we? Get logged in to Mailchimp and then we’ll get started.
{Updated for 2019}
Create an AUDIENCE
Now that you are inside your account at Mailchimp, you should see the main dashboard. At the top you’ll see the AUDIENCE. Click it.
When you get to the front page there will be a button in the upper right that says CREATE AUDIENCE.

CHIMP TIP
The menu bar at the top will lead you around the different sections on Mailchimp. Anytime you want to get back to the dashboard just click the Chimp.
Build an AUDIENCE
Now you are ready to build your first audience list. The information you need to provide is pretty straight forward and self-explanatory.
First, you will see this screen (Note: Audience used to be called Lists but it will look the same.)
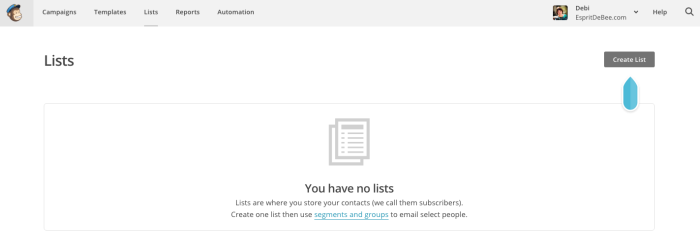
Go ahead and click on CREATE AUDIENCE
Then you’ll see this screen
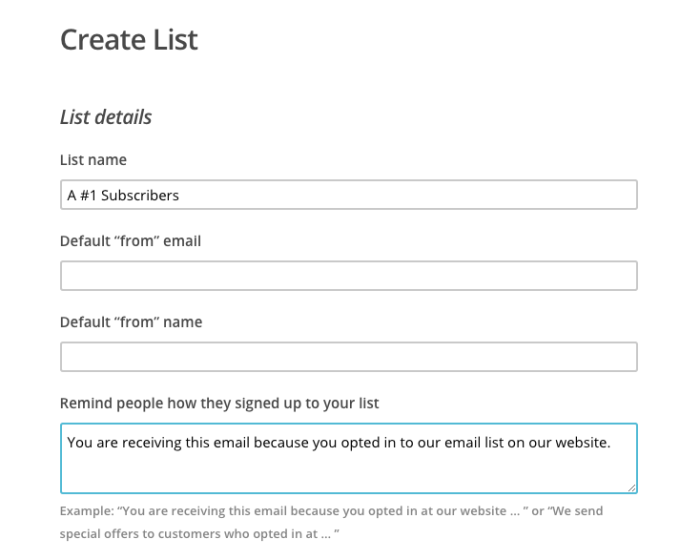
As you can see I’ve already started filling mine out. Here’s what you want to add to this section
A. Create a name for your audience
Remember, your subscribers will see this name so make sure it is appropriate and reflects who will be included in the list.
B. Choose the default email address
This is the email address you want your subscribers to see in the header of the email.
If you have a main email address but use a different address for you contact form on your blog, you might consider using it for this list as well. It need to be legit and reflect your site so your subscribers know where the email is coming from. Don’t get marked for SPAM right out of the box.
C. Select a FROM name for your emails
You can either use your name or the name of your blog. Your goal is to make it recognizable for your subscribers. Knowing where the email is from will help keep you out of the SPAM box and make your emails more likely to be opened.
D. Write a short sentence or two to remind readers why and how they are receiving your emails
This is a key piece of being in compliance with bulk email laws too.
I recommend a simple sentence such as,
“You are receiving this email because you opted in to our list on our website.” Easy peasy.
Now you’ll see a section that looks like this {UPDATE: This screen now includes two extra options, the double opt-in and the GDPR fields. Check both of these. It’s important for staying compliant.}
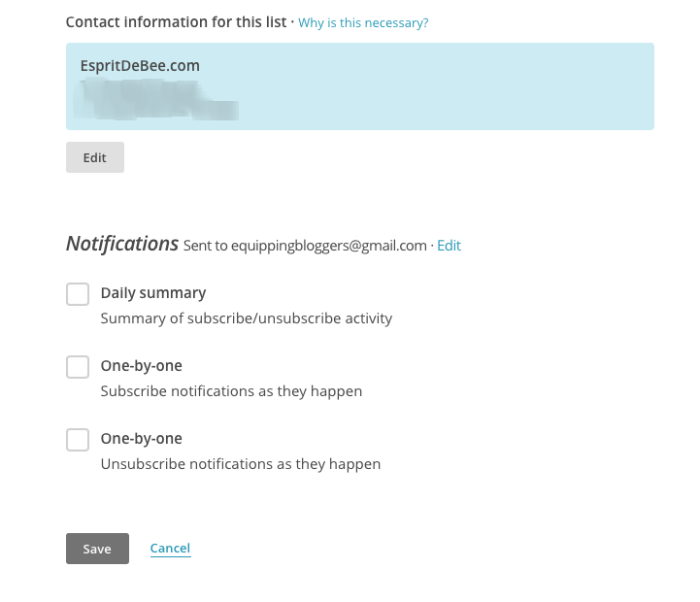
E. Confirm your mailing address
We talked about the importance of using a physical address in a previous post. This is critical. Remember, you can change this at any time, so even if you need to use one address to get started and then change it when you are ready to go live. Be sure to stay within the CAN-SPAM guidelines.
F. Form Settings
Check both of these boxes, especially if you are new to email lists. This will save you a lot of grief later on, trust me.
G. Notifications
There are plenty of things you need to keep track of in a day. Your email subscribes and unsubscribes should not be one of them. Check the DAILY SUMMARY box on this section and you will be sent a digest of sign ups each day they happen.
H. SAVE
Now save your selections and you will be directed to your audience homepage. Each audience list you create will have its own page where you can now begin to create your forms, manage your subscribers, and see your stats.

CHIMP TIP
Anytime you are in Mailchimp, you can press the “S” key on your keyboard to get a search box. There are many such shortcuts with this app. They make it easy to use and simple to get help. Another reason I recommend Mailchimp for building your email list.
There you have it. Another step in the process of getting you up and running on Mailchimp. You have now built your first audience in Mailchimp.
If you have any questions, please do not hesitate to ask them in the comments.
#YouCanDoThis

[mc4wp_form id=”11788”]

